LAUNCH
An Interactive Learning Workspace for documentation and project management in Project-Based Learning Classes.
Overview
Time
September 2019 - December 2019
Client
A local high school
My Role
Research, Ideation, Product Design, Video Prototype
Keywords
Learning Experience Design, PBL, Documentation
Teammates
Chelsea Hua, Estelle Jiang, Hannah Xue
My Contribution
For the research part, I was responsible for creating protocols, conducting interviews, synthesizing insights, and creating models.
For designing and prototyping, I was responsible for designing the experience and main features of the system and directing and creating the video prototype for testing with users.
Our MediumProblem
One of the biggest problems for project-based learning (PBL) is that it’s difficult for students to document their work artifacts and their work process during the course of the projects.
How might we create a non-distracting and easy-to-use tool for students to better manage their projects and document their work for reference, reflection, and showcase?
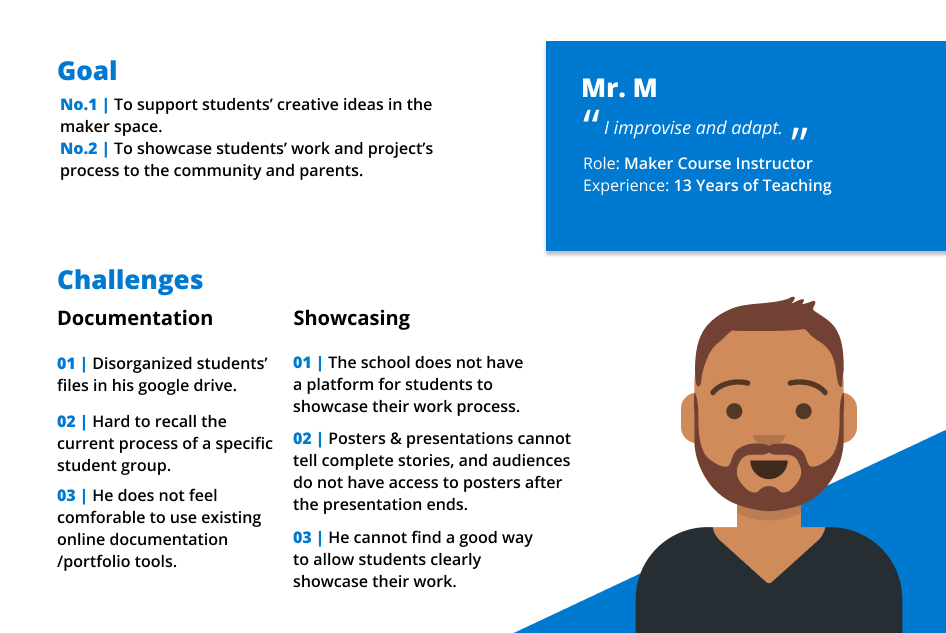
Client Background: We are working with Mr. M, the instructor of a PBL course at a local high school. His course is a maker space course teaching 3D modeling with self-defined group projects.
Solution
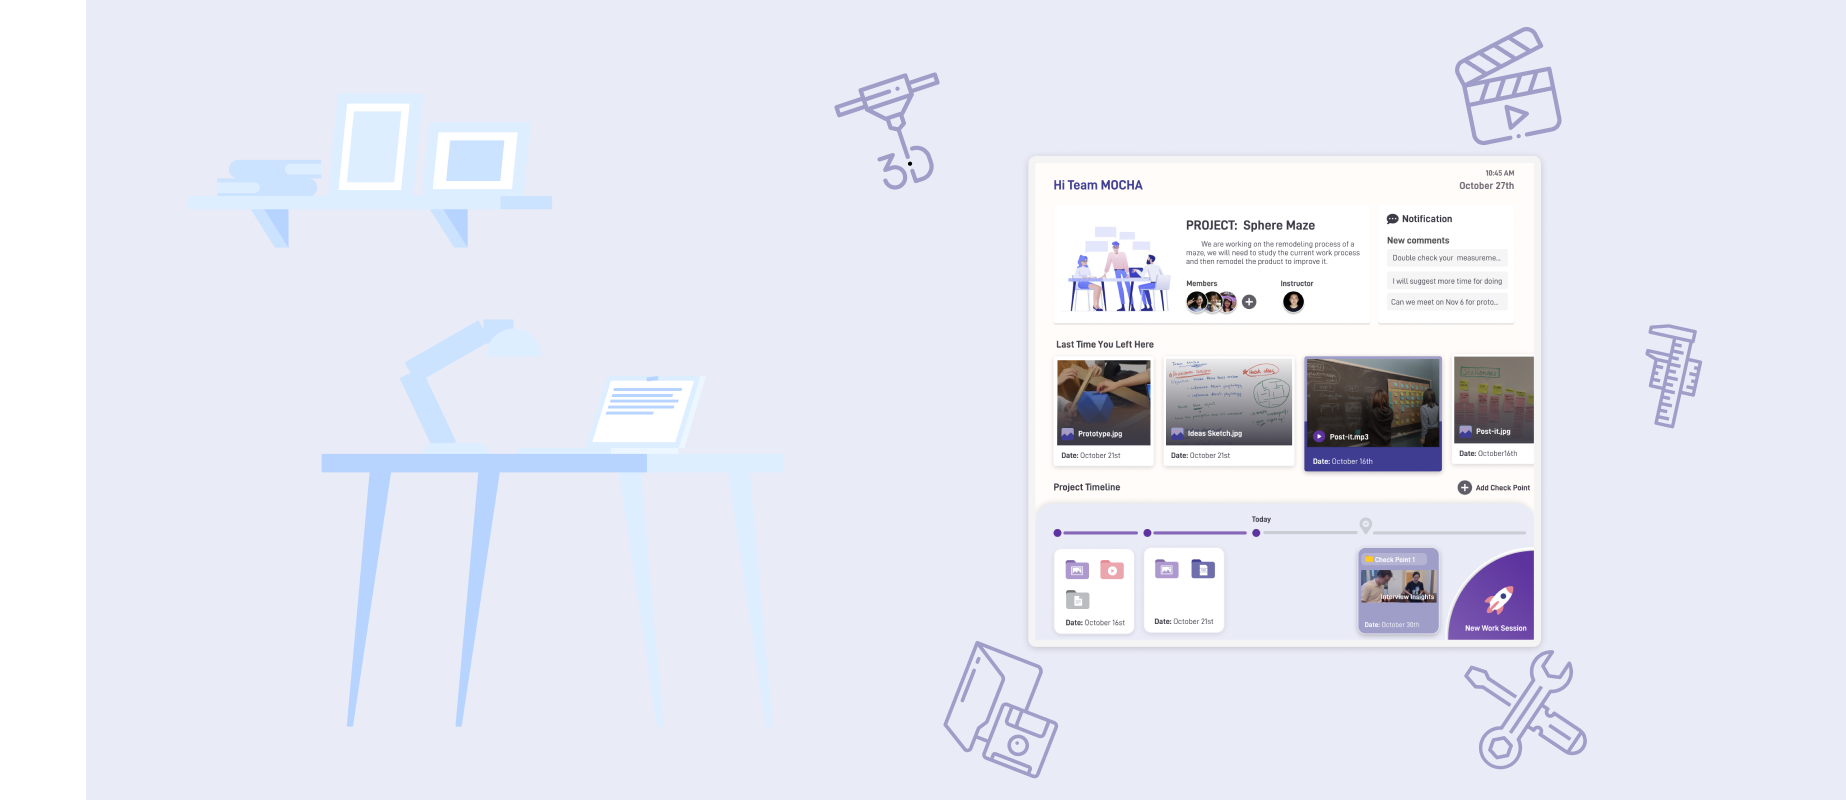
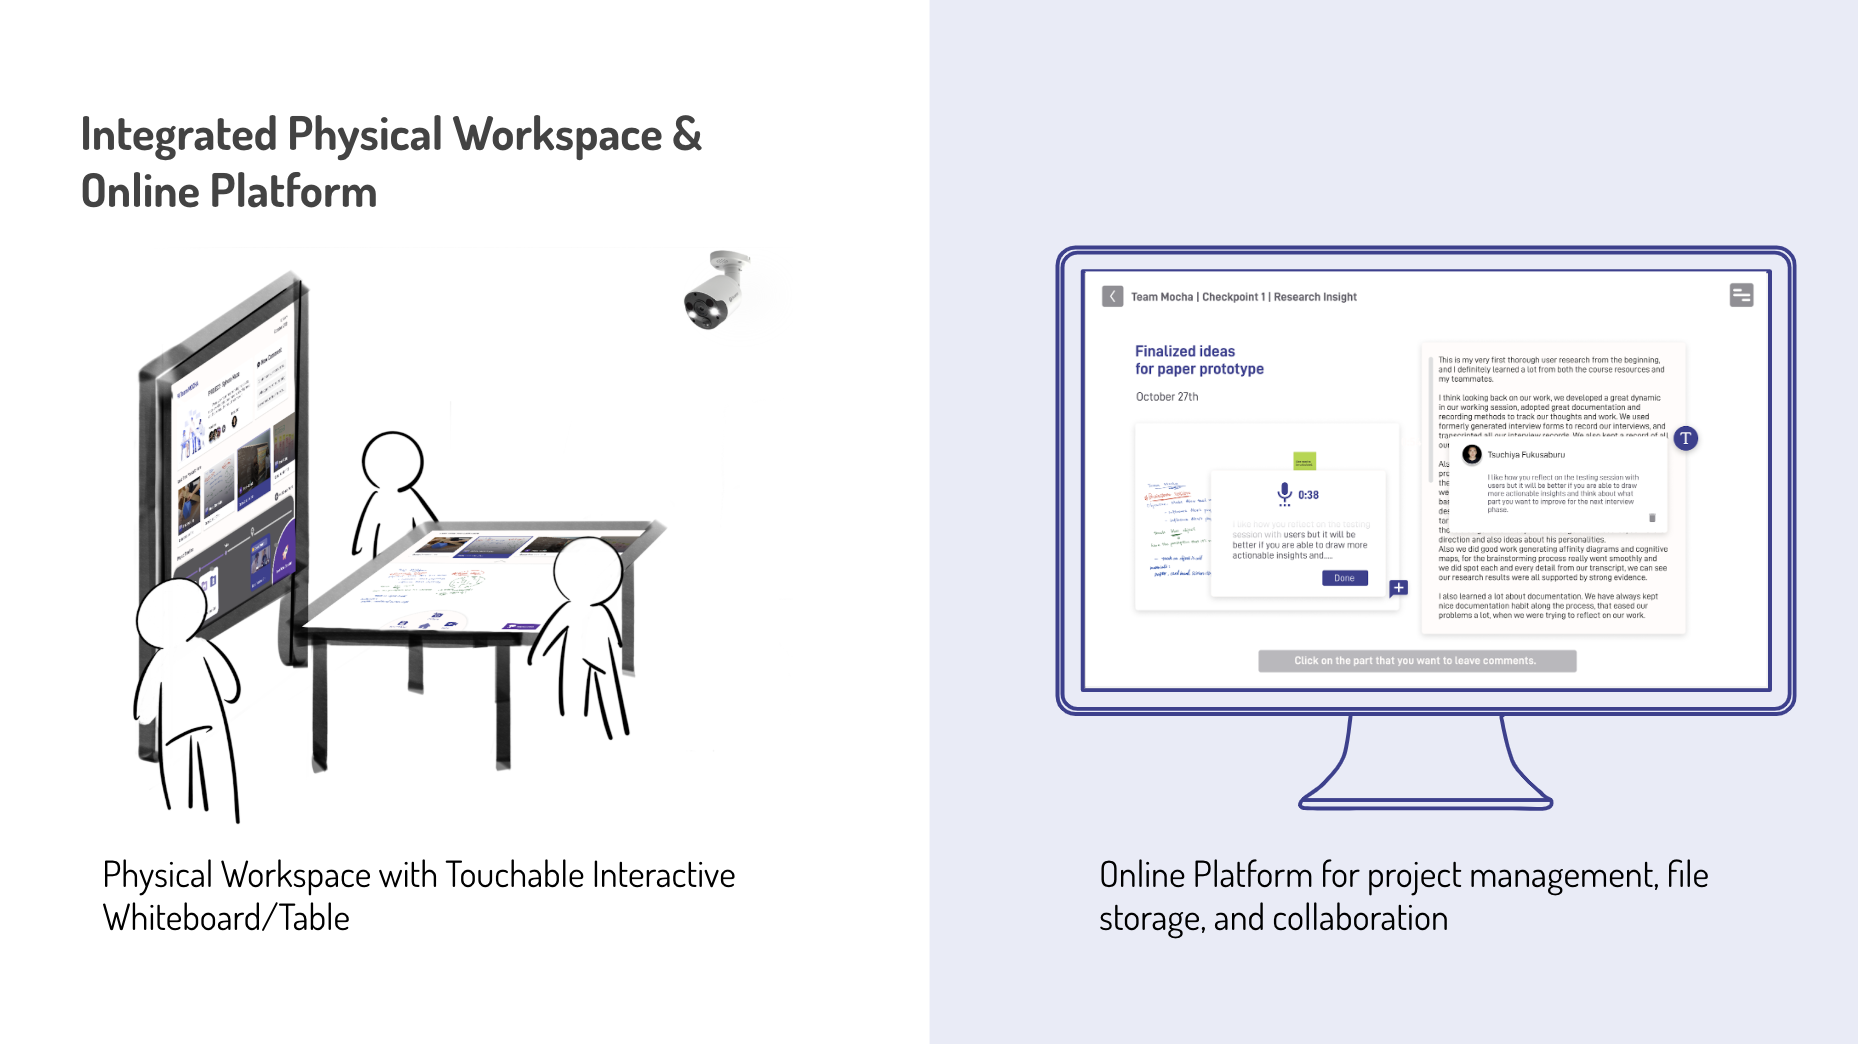
We designed LAUNCH. It’s an integrated workspace with interactive whiteboards/tables and an online collaboration platform.
It can:
- Save students' creative work like sketches and notes
- Provide enriched information to help them create prototypes
- Document students' work process with pictures, audio, and video
- Organize their work artifacts and share them with the instructor for assessment and feedback
Concept Video
Design Process
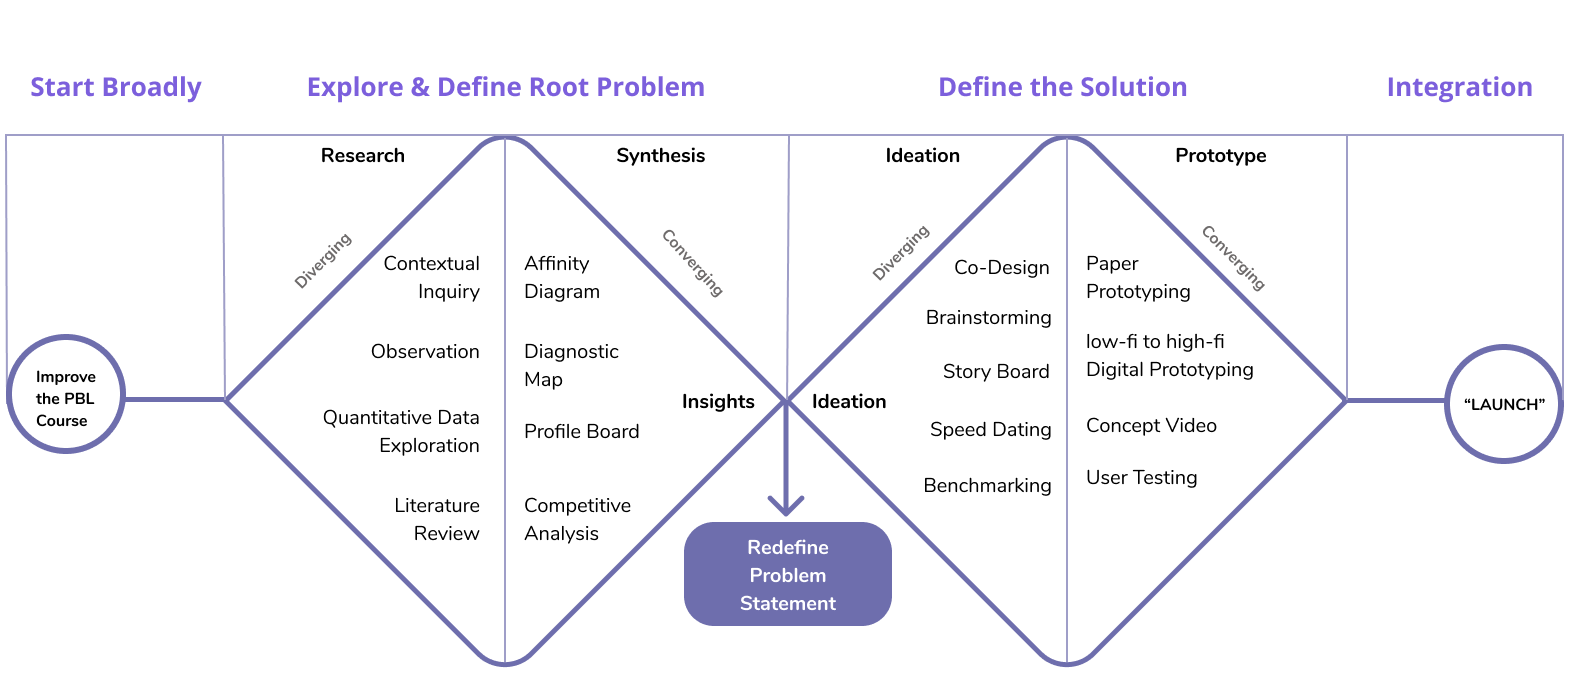
Exploration Phase
■ Literature Review
Before we dive into the process of on-site explorations, we conducted literature reviews of project-based learning, makerspaces, and the role of documentation and portfolios.
We specifically looked at the examples of PBLWorks, Maker Movement, and Open Portfolios project to understand current practices and learning goals in PBL.
From the literature review, we found the following elements to be important for PBL courses:

■ Understanding Educators
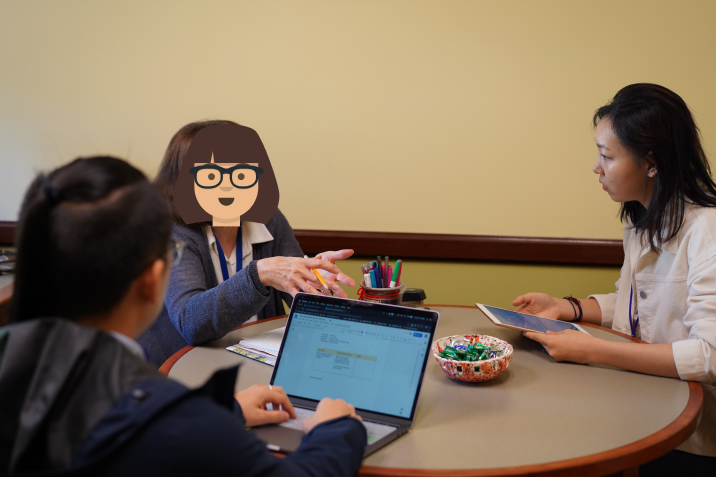
To understand the current challenges that are specific to our client, we first conducted semi-structured interviews with two educators - the instructor of the PBL course and the school director.
Interview with Mr.M - Class Instructor
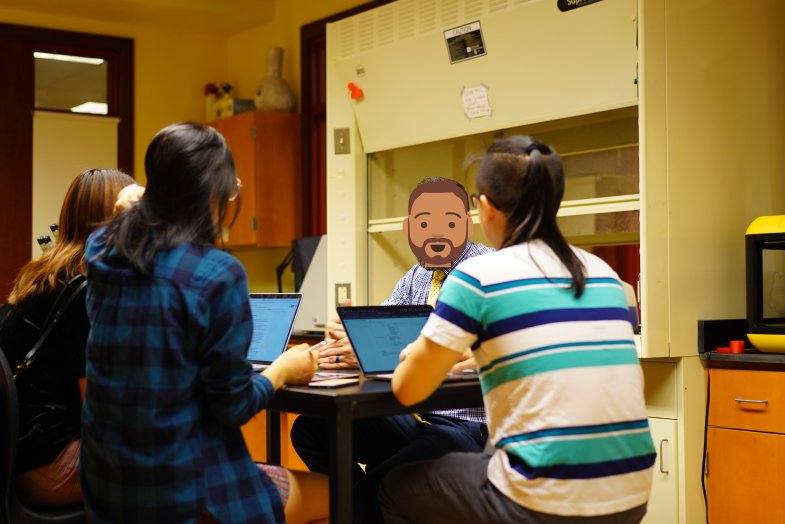
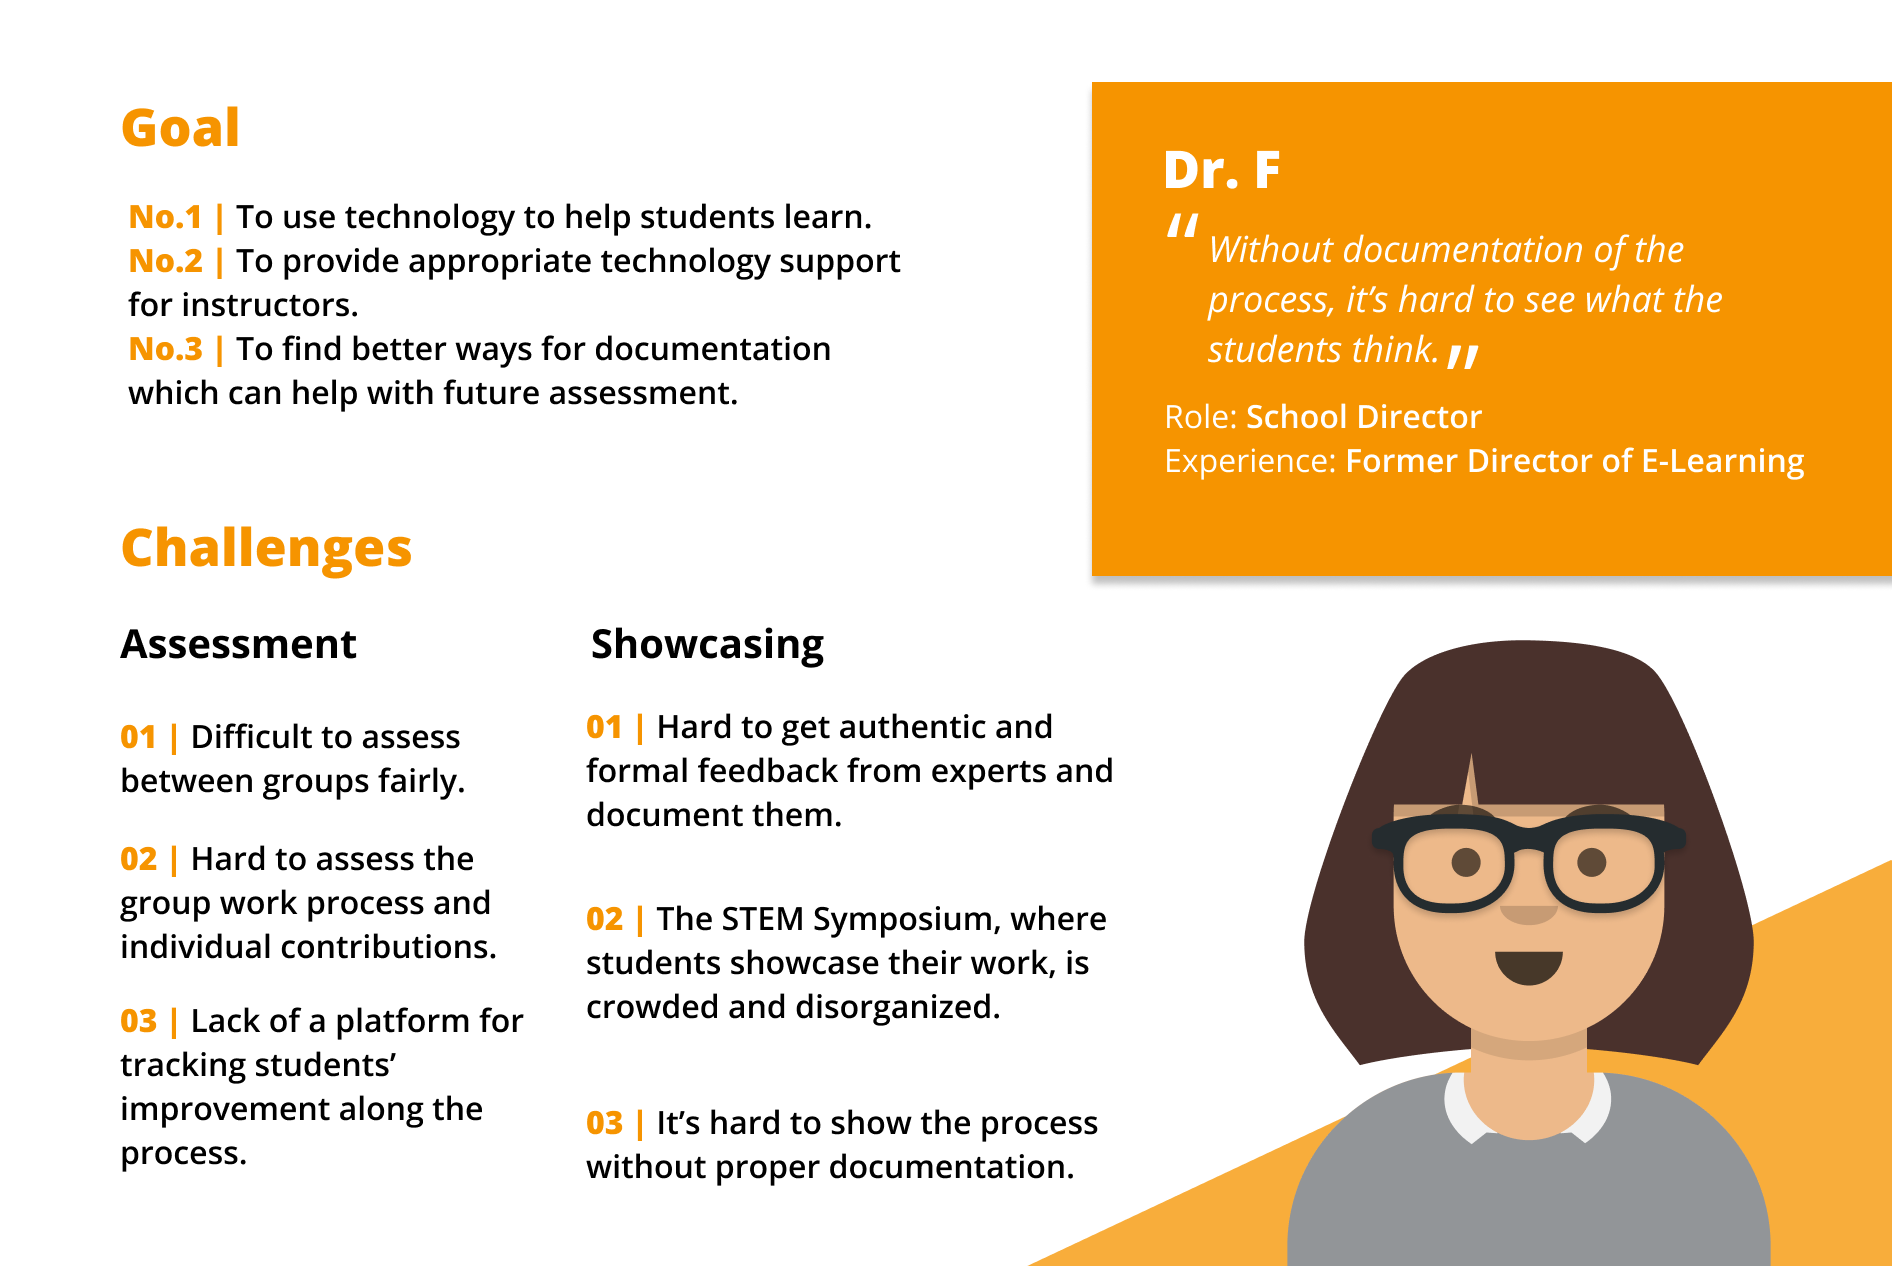
Interview with Dr.F - School Director
Synthesis and Analysis
To better understand the relationships among the challenges of these stakeholders and their concerns, we used diagnostic maps to analyze the causes, consequences, and possible solutions of the problems, including documentation, assessment, feedback, and showcase.
From the diagnostic maps, we identified that poor documentation is actually the root problem for other problems in assessments, feedback, and showcase.
Without good documentation of both the work artifacts and the work process, it will be hard for students to showcase their design process and iterations to the instructor and to the community. Thus, it was hard for the instructor to track and assess their improvements and for the community to recognize the achievements of the students.
■ Understanding Students in Context
As we pinpointed documentation as the main and root problem in the class, we proceeded to investigate the students' current practices of documentation in their projects through on-site observations and understand their opinions on documentation through online surveys.
Synthesis and Analysis
We used an affinity diagram to summarize the findings that we collected from both the observation and the online survey.
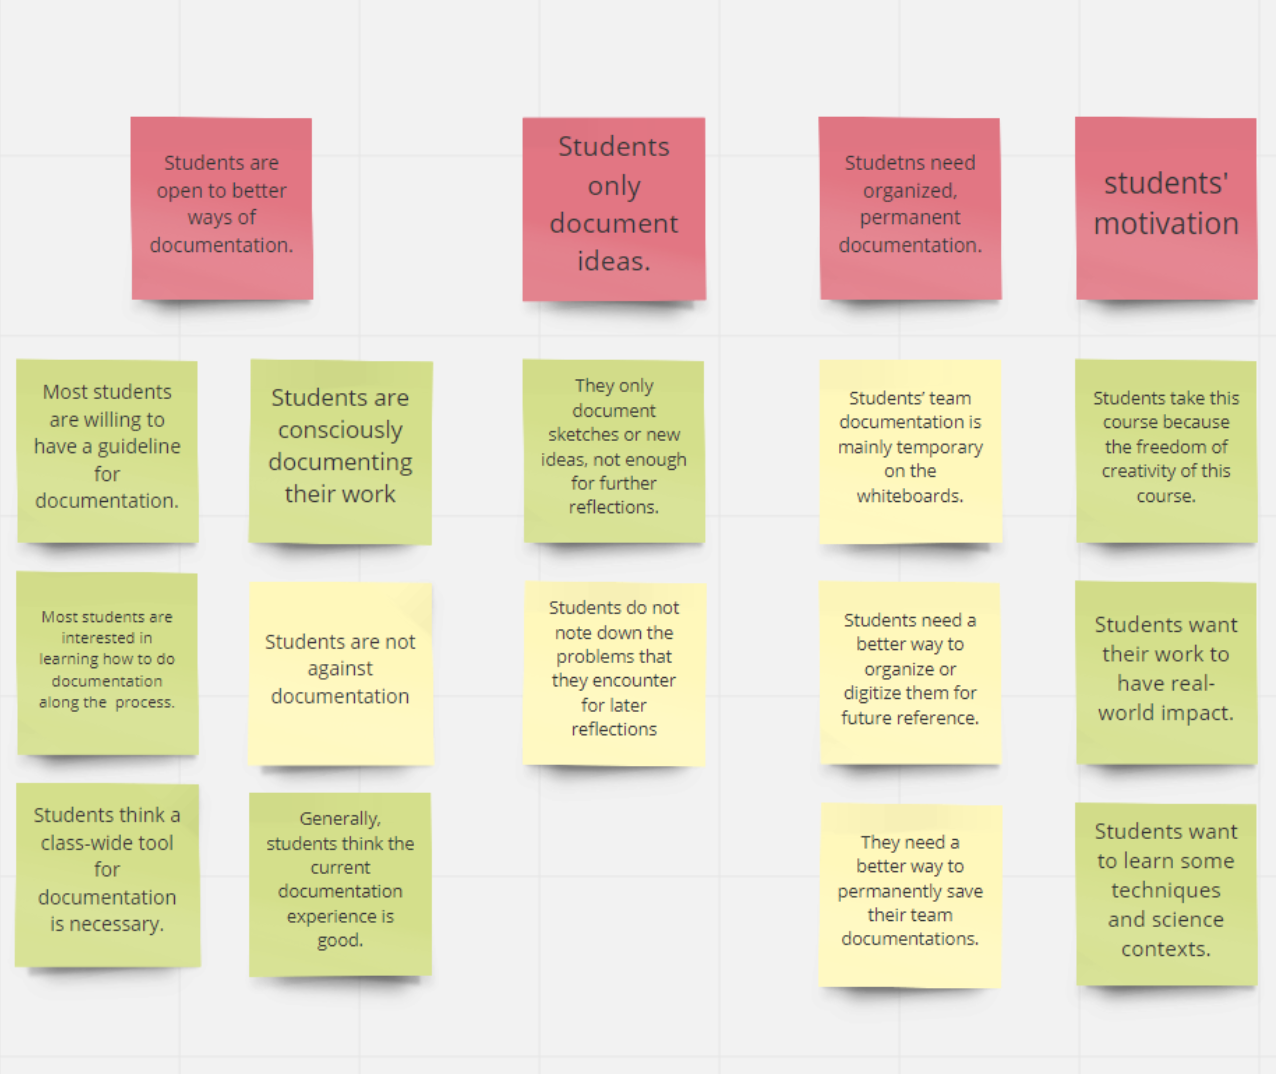
We found that
- Students only document their ideas but not their work process.
- They lack permanent, organized documentation for project management and for future reference and reflections.
- They need motivation for documentation and they need to learn better documentation approaches.
■ Defining Design Vision
Based on the insights and findings from our research phase, we defined our design vision to be:
"By creating a non-distracting and easy to use documentation tool, students can better manage their projects pieces and document their work efficiently for learning, reflection and showcase."
Design Phase
■ Ideation
Brainstorming and Storyboarding
To generate design ideas, we conducted a brainstorming session following our design vision. We came up with 50+ initial ideas and grouped them by the specific points that they are targeting.
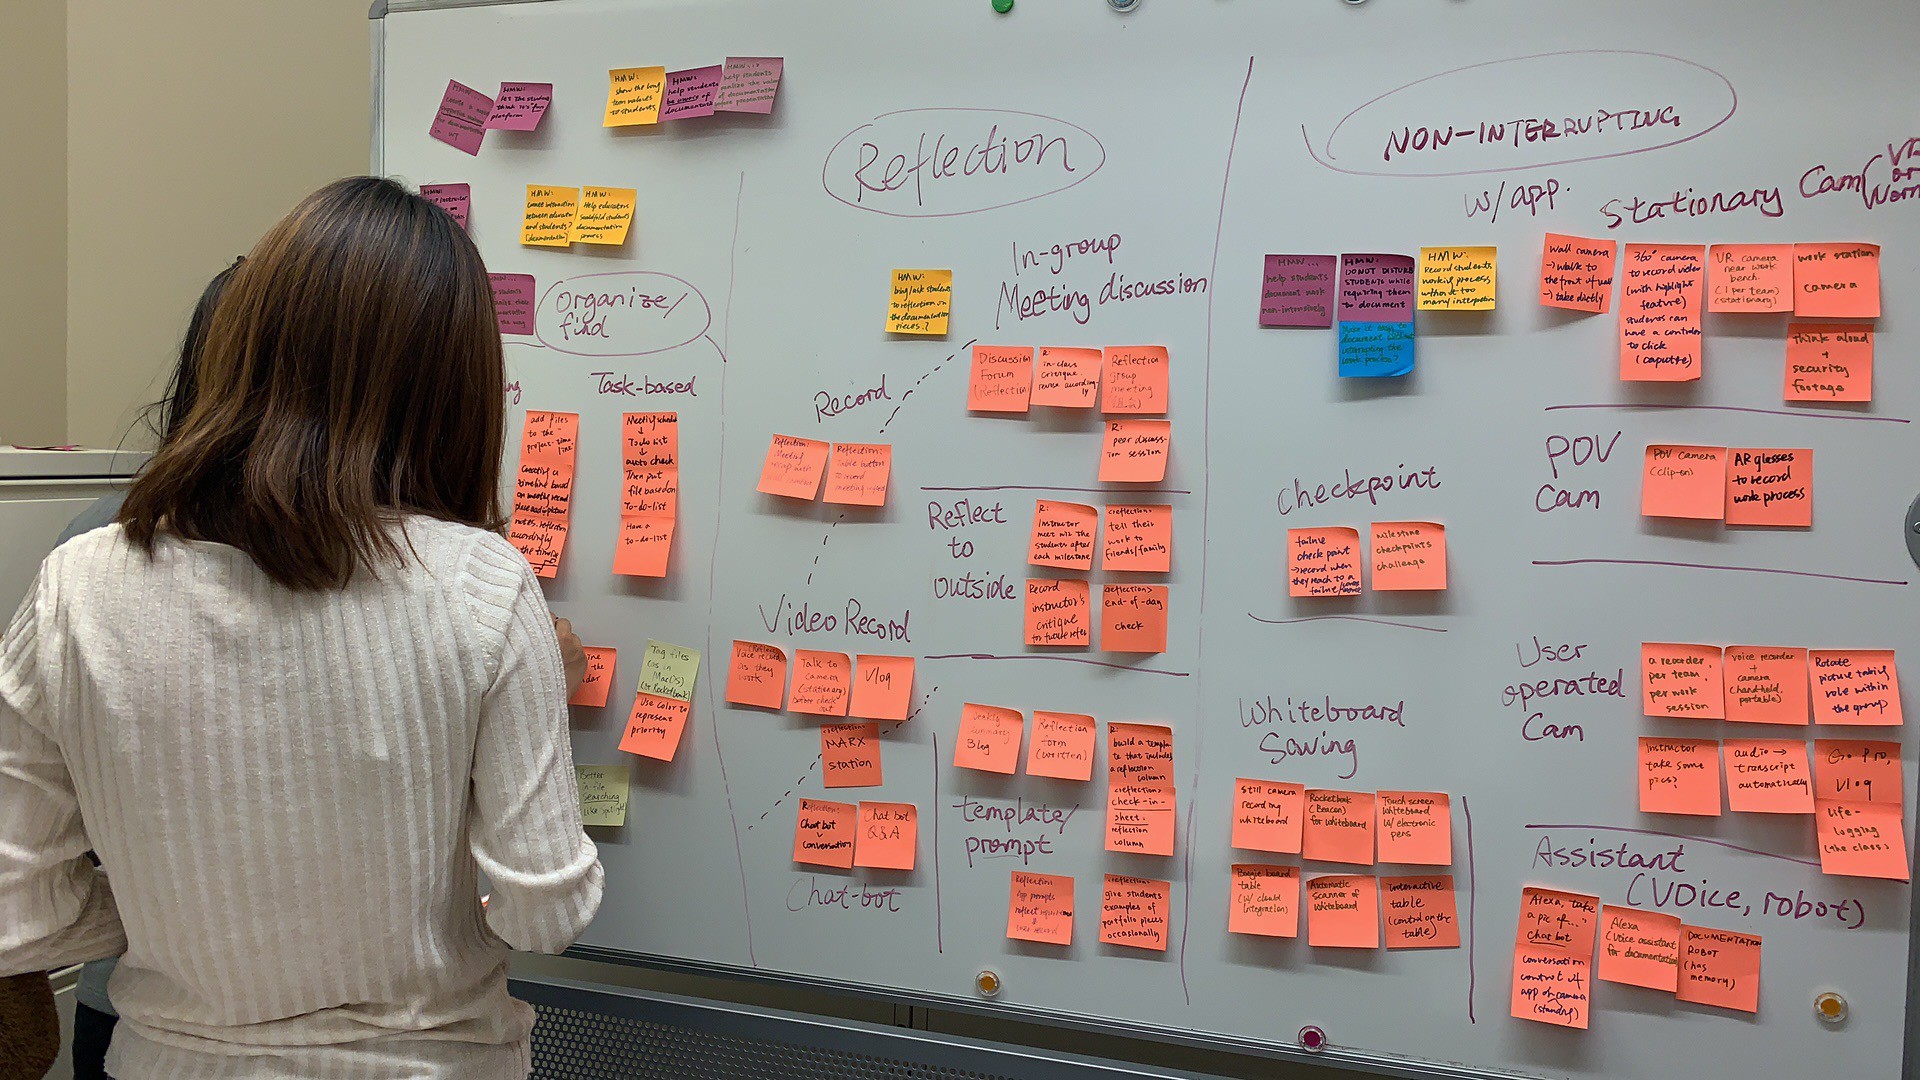
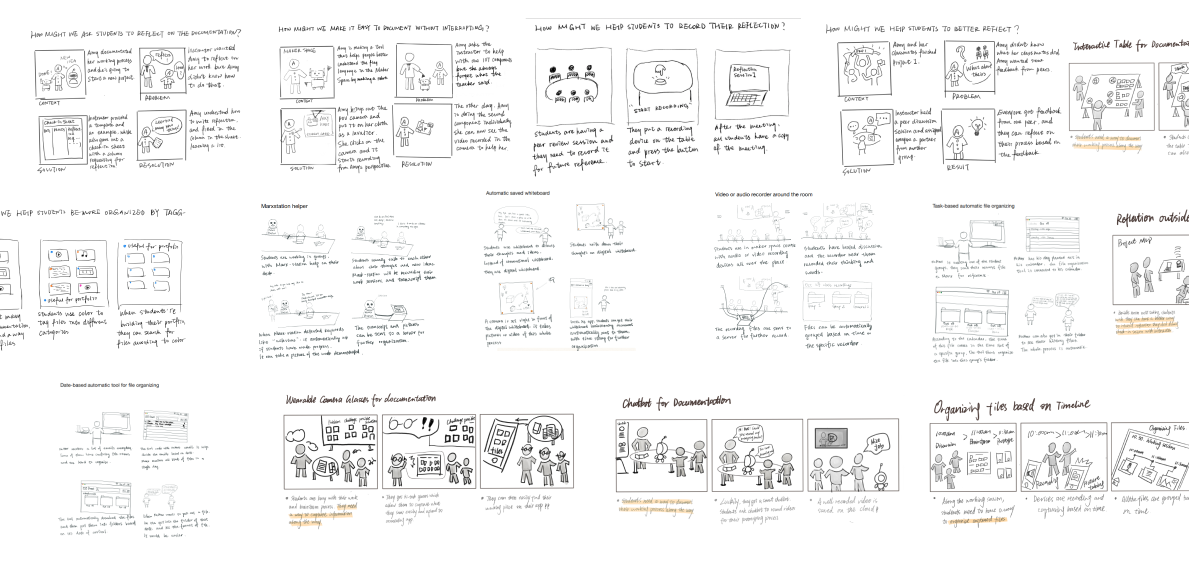
Through discussion and voting, we narrowed down our potential solutions into 20 representative and reasonable scenarios and created storyboards based on these scenarios.
These storyboards represented different directions of possible design, including low-tech vs. high-tech, learner-centered vs. technology-centered, etc.
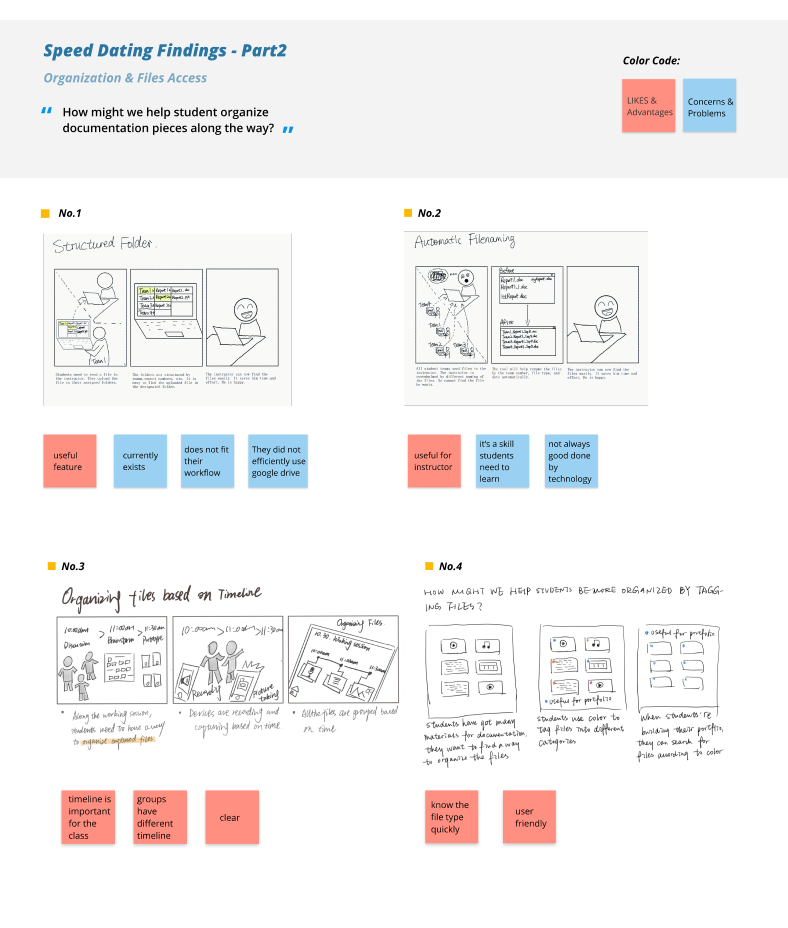
Validating Ideas through Speed-dating
To validate the stakeholder’s needs, we conducted a speed-dating session with Mr. M. The purpose of the speed-dating session is to explore the stakeholders' acceptance of the potential design ideas and see if the design ideas would cater to their needs.
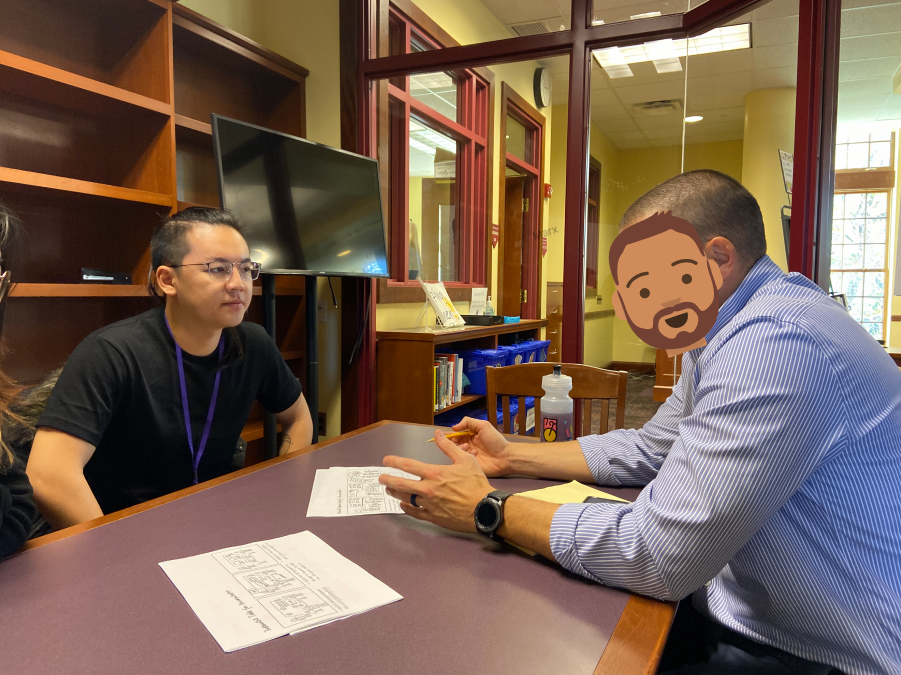
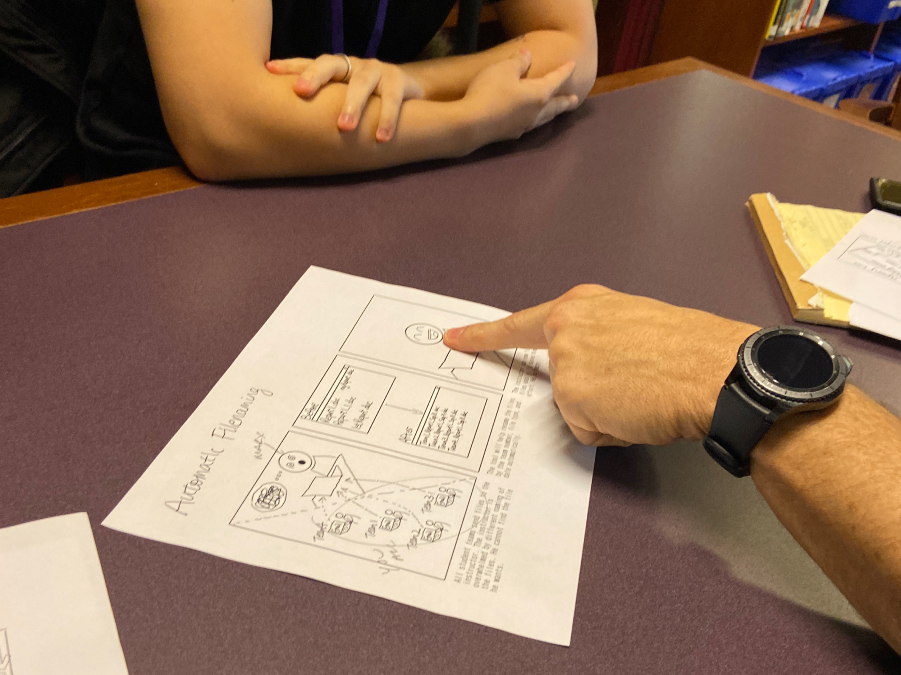
We organized the instructor's feedback regarding each design idea and synthesized the following findings.
Speed-dating Findings
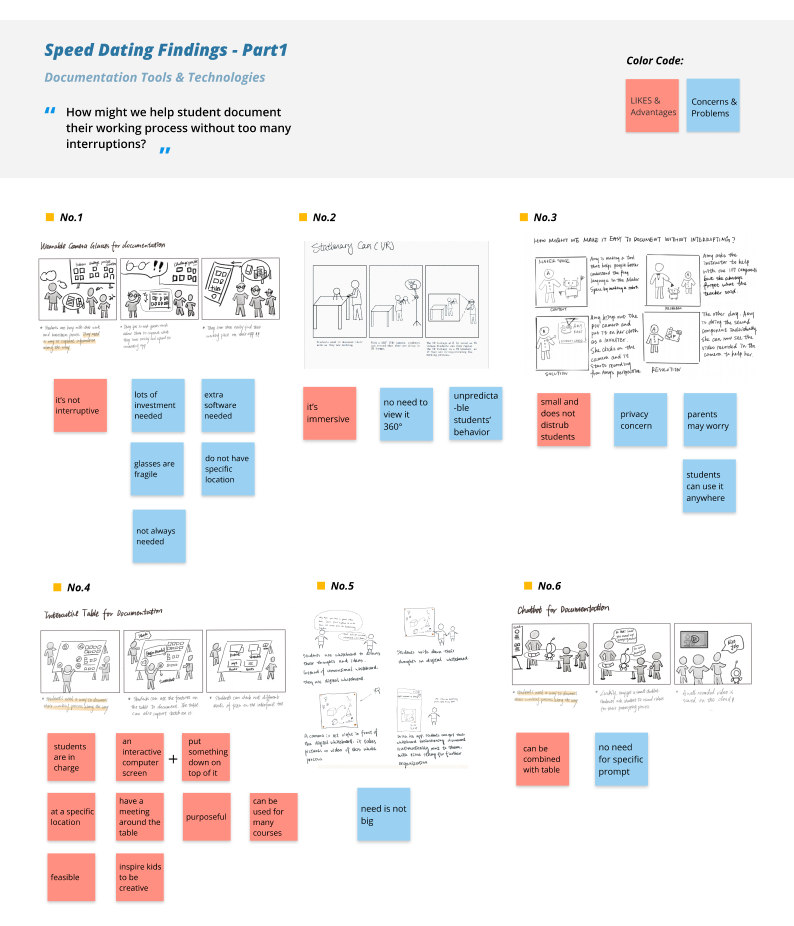
1. Choose the suitable technology
Some high-tech solutions like VR maybe too distracting to be used in the class, but AR can be used to help students with their 3-D modeling prototyping process.
2. Document multiple types of evidence
Multiple types of evidence, including images, sound, and videos need to be saved for students' documentation, for teacher's assessment, and for showcase purposes.
3. Organize files for students and for the instructor
Keeping the working documents organized can help students form good habits in project management and make it convenient for the instructor to assess and evaluate students' work.
■ Making Design Decisions
Based on the speed-dating and our previous research, we made the following design decisions regarding the main features of our design:
* Hover over card to see evidence
Physical Whiteboard + Online Platform
Observation: Students work on the whiteboards and tables in in-class work sessions.
"A physical whiteboard or table will not be so much distracting." - Mr.M
"I would want to access and edit the files when I'm at home." - Student
Customizable Timeline Folders for Organizing Files
"It should put the students in charge of, like, managing and organizing their stuff. It's prompting them to think about where it goes but not doing it for them." - Mr. M
"The timeline is really important for me to track their progress. Not everybody has the same timeline. They're all in different places." - Mr. M
Enriched AR Overlay for Prototyping
"We measure the dimensions of the prototypes so we can estimate the numbers in the CAD model." - Student
"It would be nice if the kids can compare their prototypes to their sketches or drawings." - Mr. M
Optional Guided Reflections
Learning Goal: Reflections help students build meta-procedural skills, which are important learning goals for PBL courses.
"It could provide some general prompts, but it should not be like, step by step. Otherwise, it will create lazy students and we are not doing a good job as teachers." - Mr. M
Teacher Comments
Observation: The instructor gives verbal feedback to students in-class and email feedback out-of-class.
"I might want to type when I'm on a computer in my office. But I want to just point at their sketch or model and say it directly to them when I'm in class facing them." - Mr. M
With these main features chosen, the learning experience can be shown with the following journey map:
Prototype & Iterations Phase
After we decided on which features to include, we started our prototyping process. The main goal of prototyping was to test the flow of the design solution to gather feedback from the stakeholders/users and make iterations based on their feedback. We were mainly focused on the role of our design in students' learning experience and the look-and-feel of our design.
■ Paper Prototype & Wizard-Of-Oz Testing
For the first round of prototyping, we decided to use paper prototypes with lo-fi interfaces in a Wizard-Of-Oz style testing. These two prototyping methods are low-cost and time-efficient for us to get feedback on the role of our design.
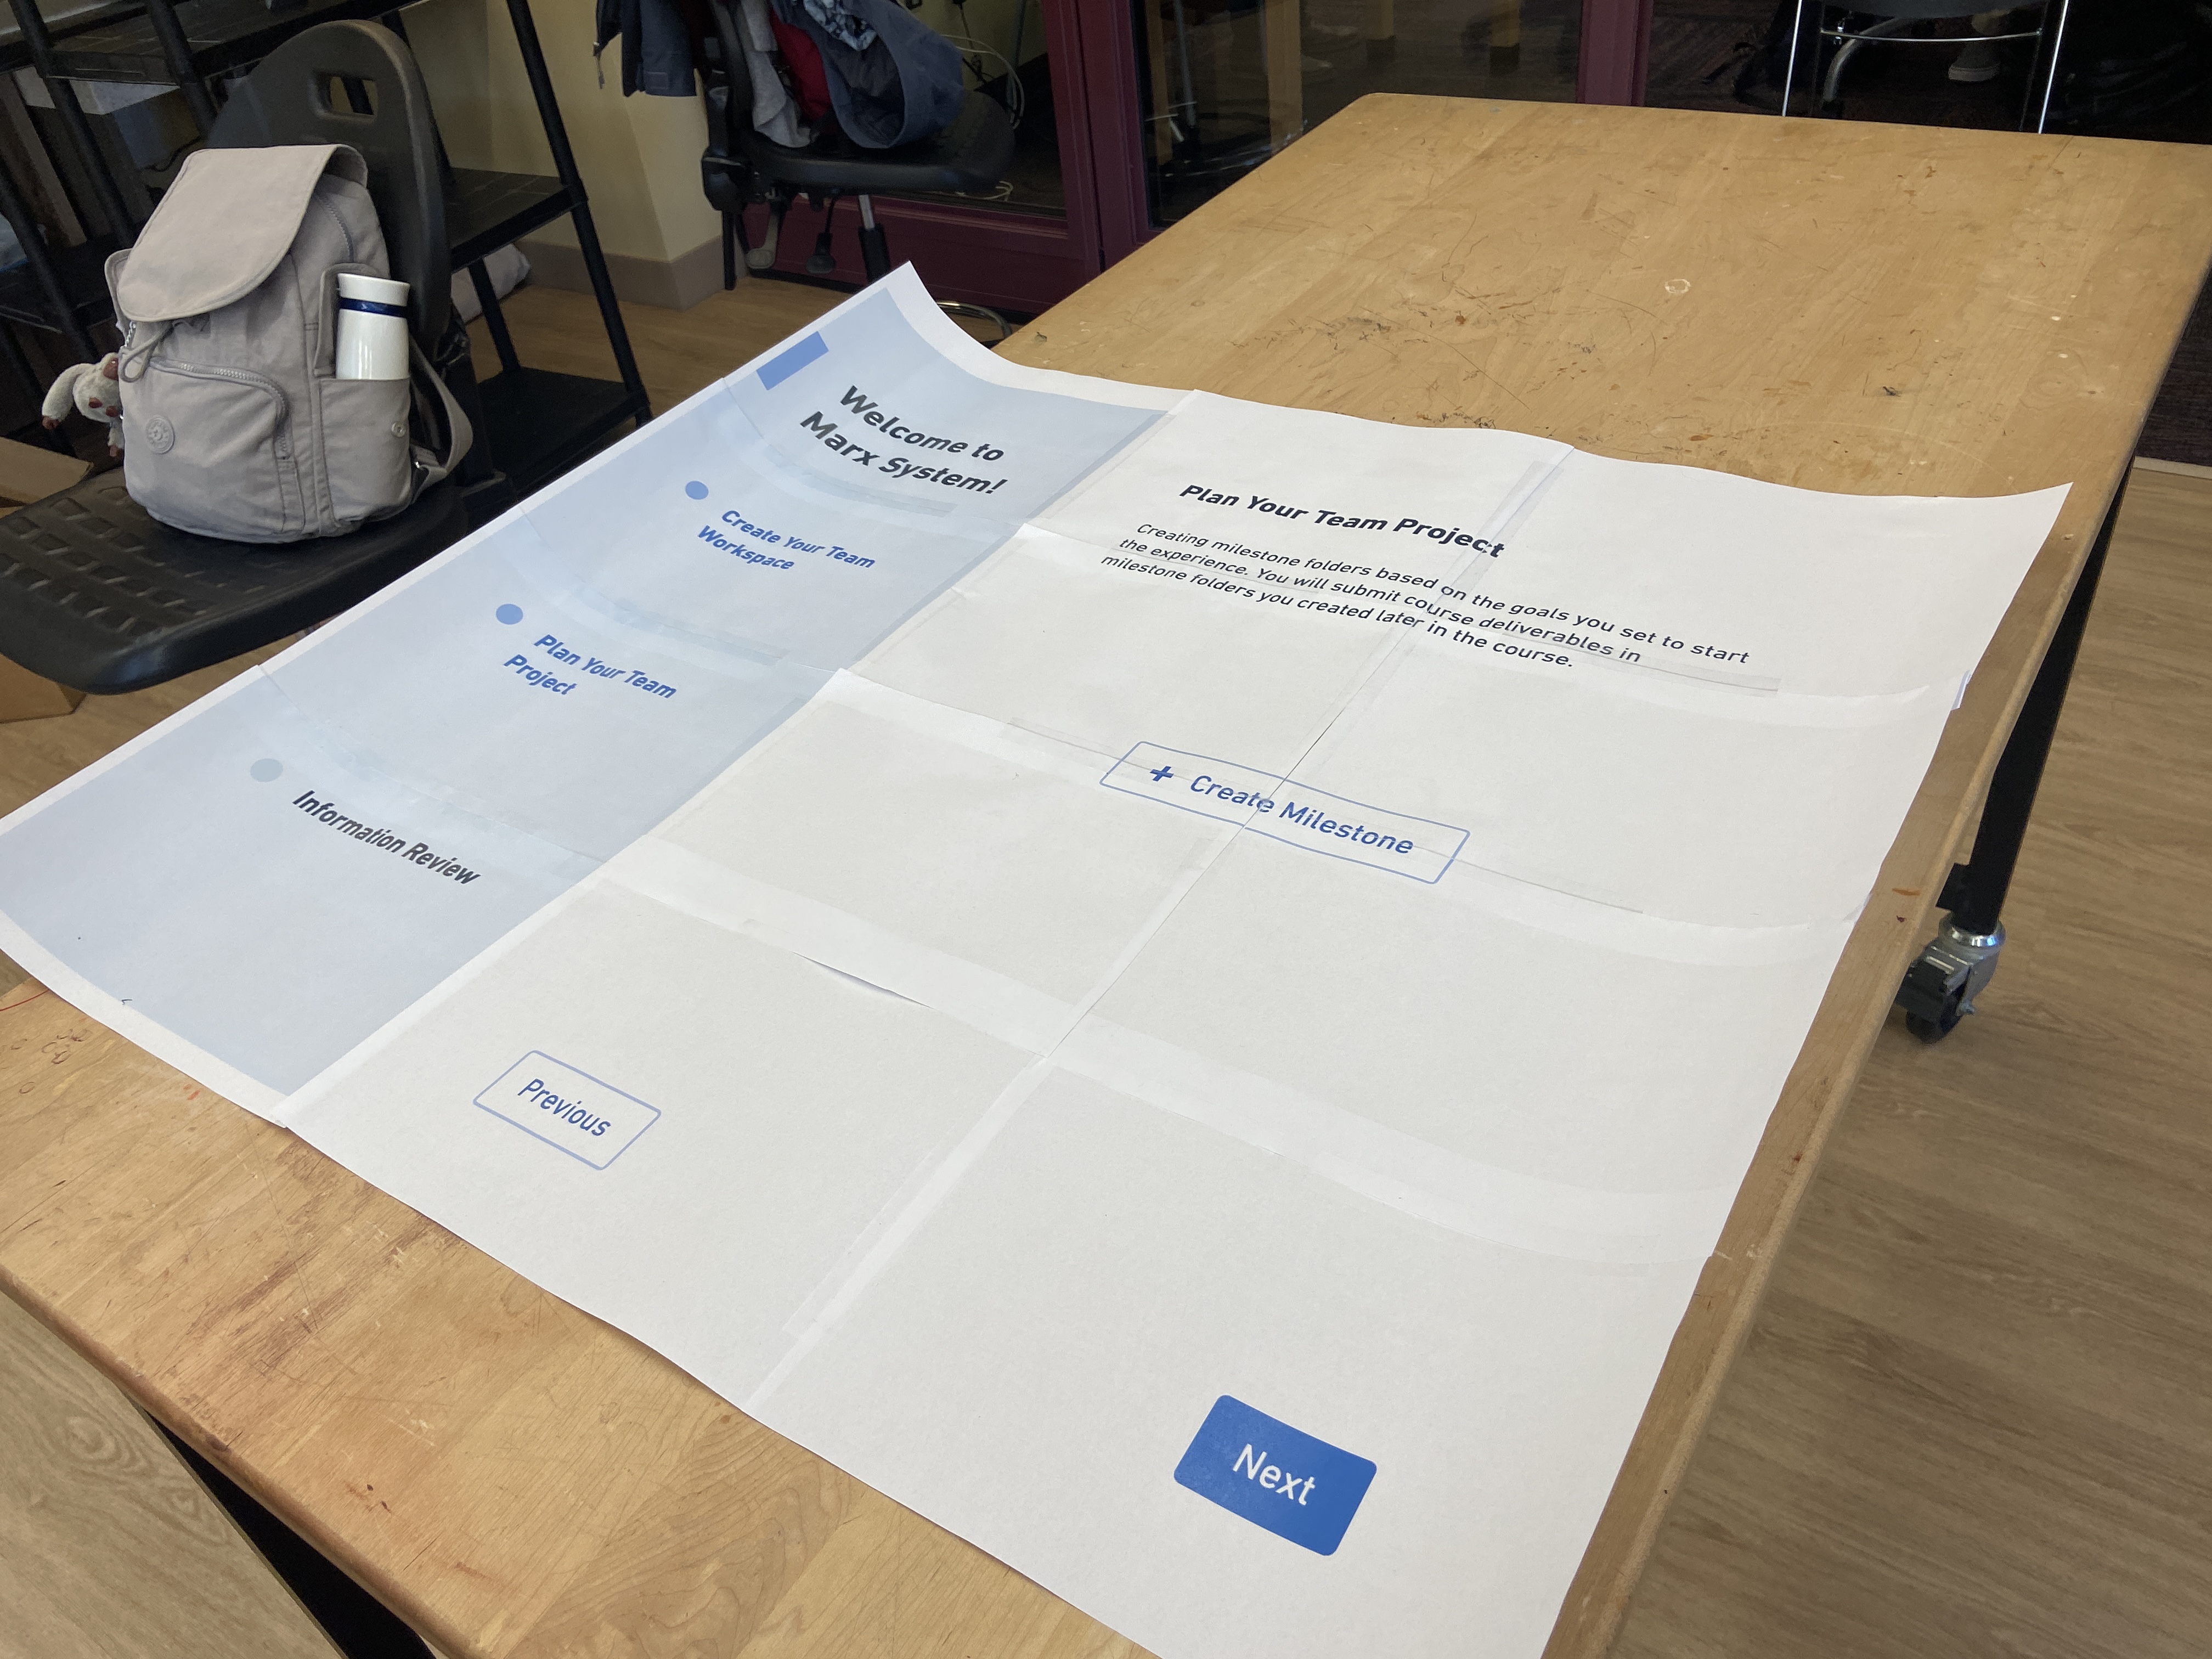
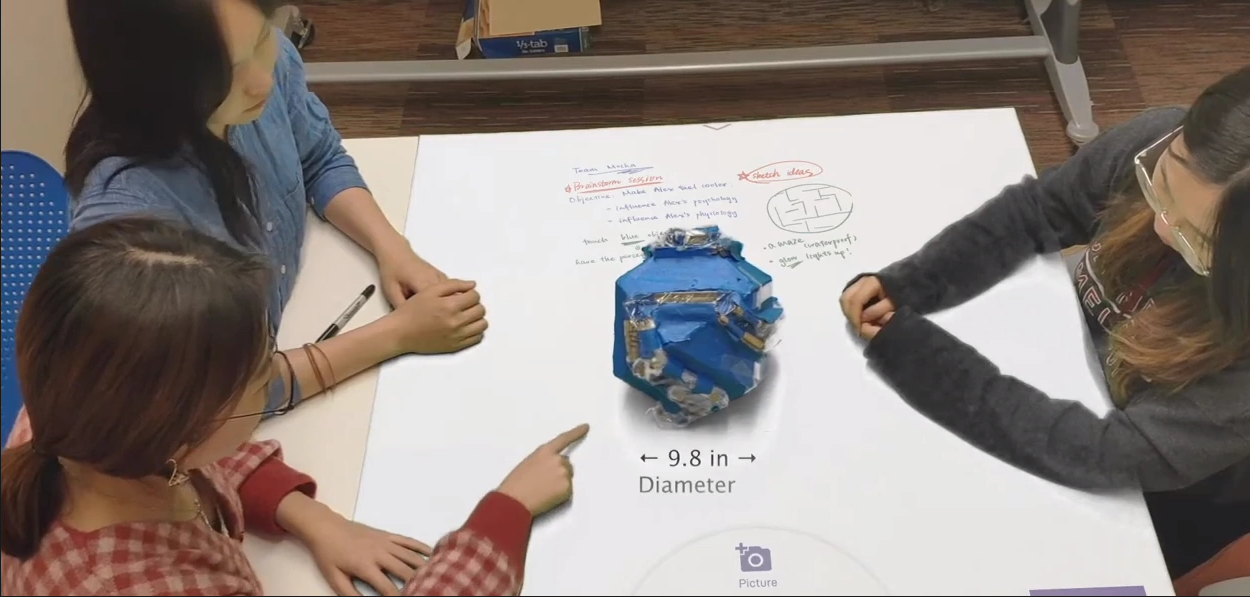
We brought the paper prototypes into one of the in-class work sessions so that we could test the role of our design within the actual context of students' learning.
We set up the paper prototypes on a table and asked the students to perform some tasks that they would normally do in their typical work process, including planning projects, saving work, and doing reflections. The interactions were simulated in a Wizard-Of-Oz style, in which we flipped the paper prototypes to pretend the actual functionality.
From this round of prototyping, we found that the students like the general idea of our design. They also provided specific feedback on individual features, based on which we made the following iterations:
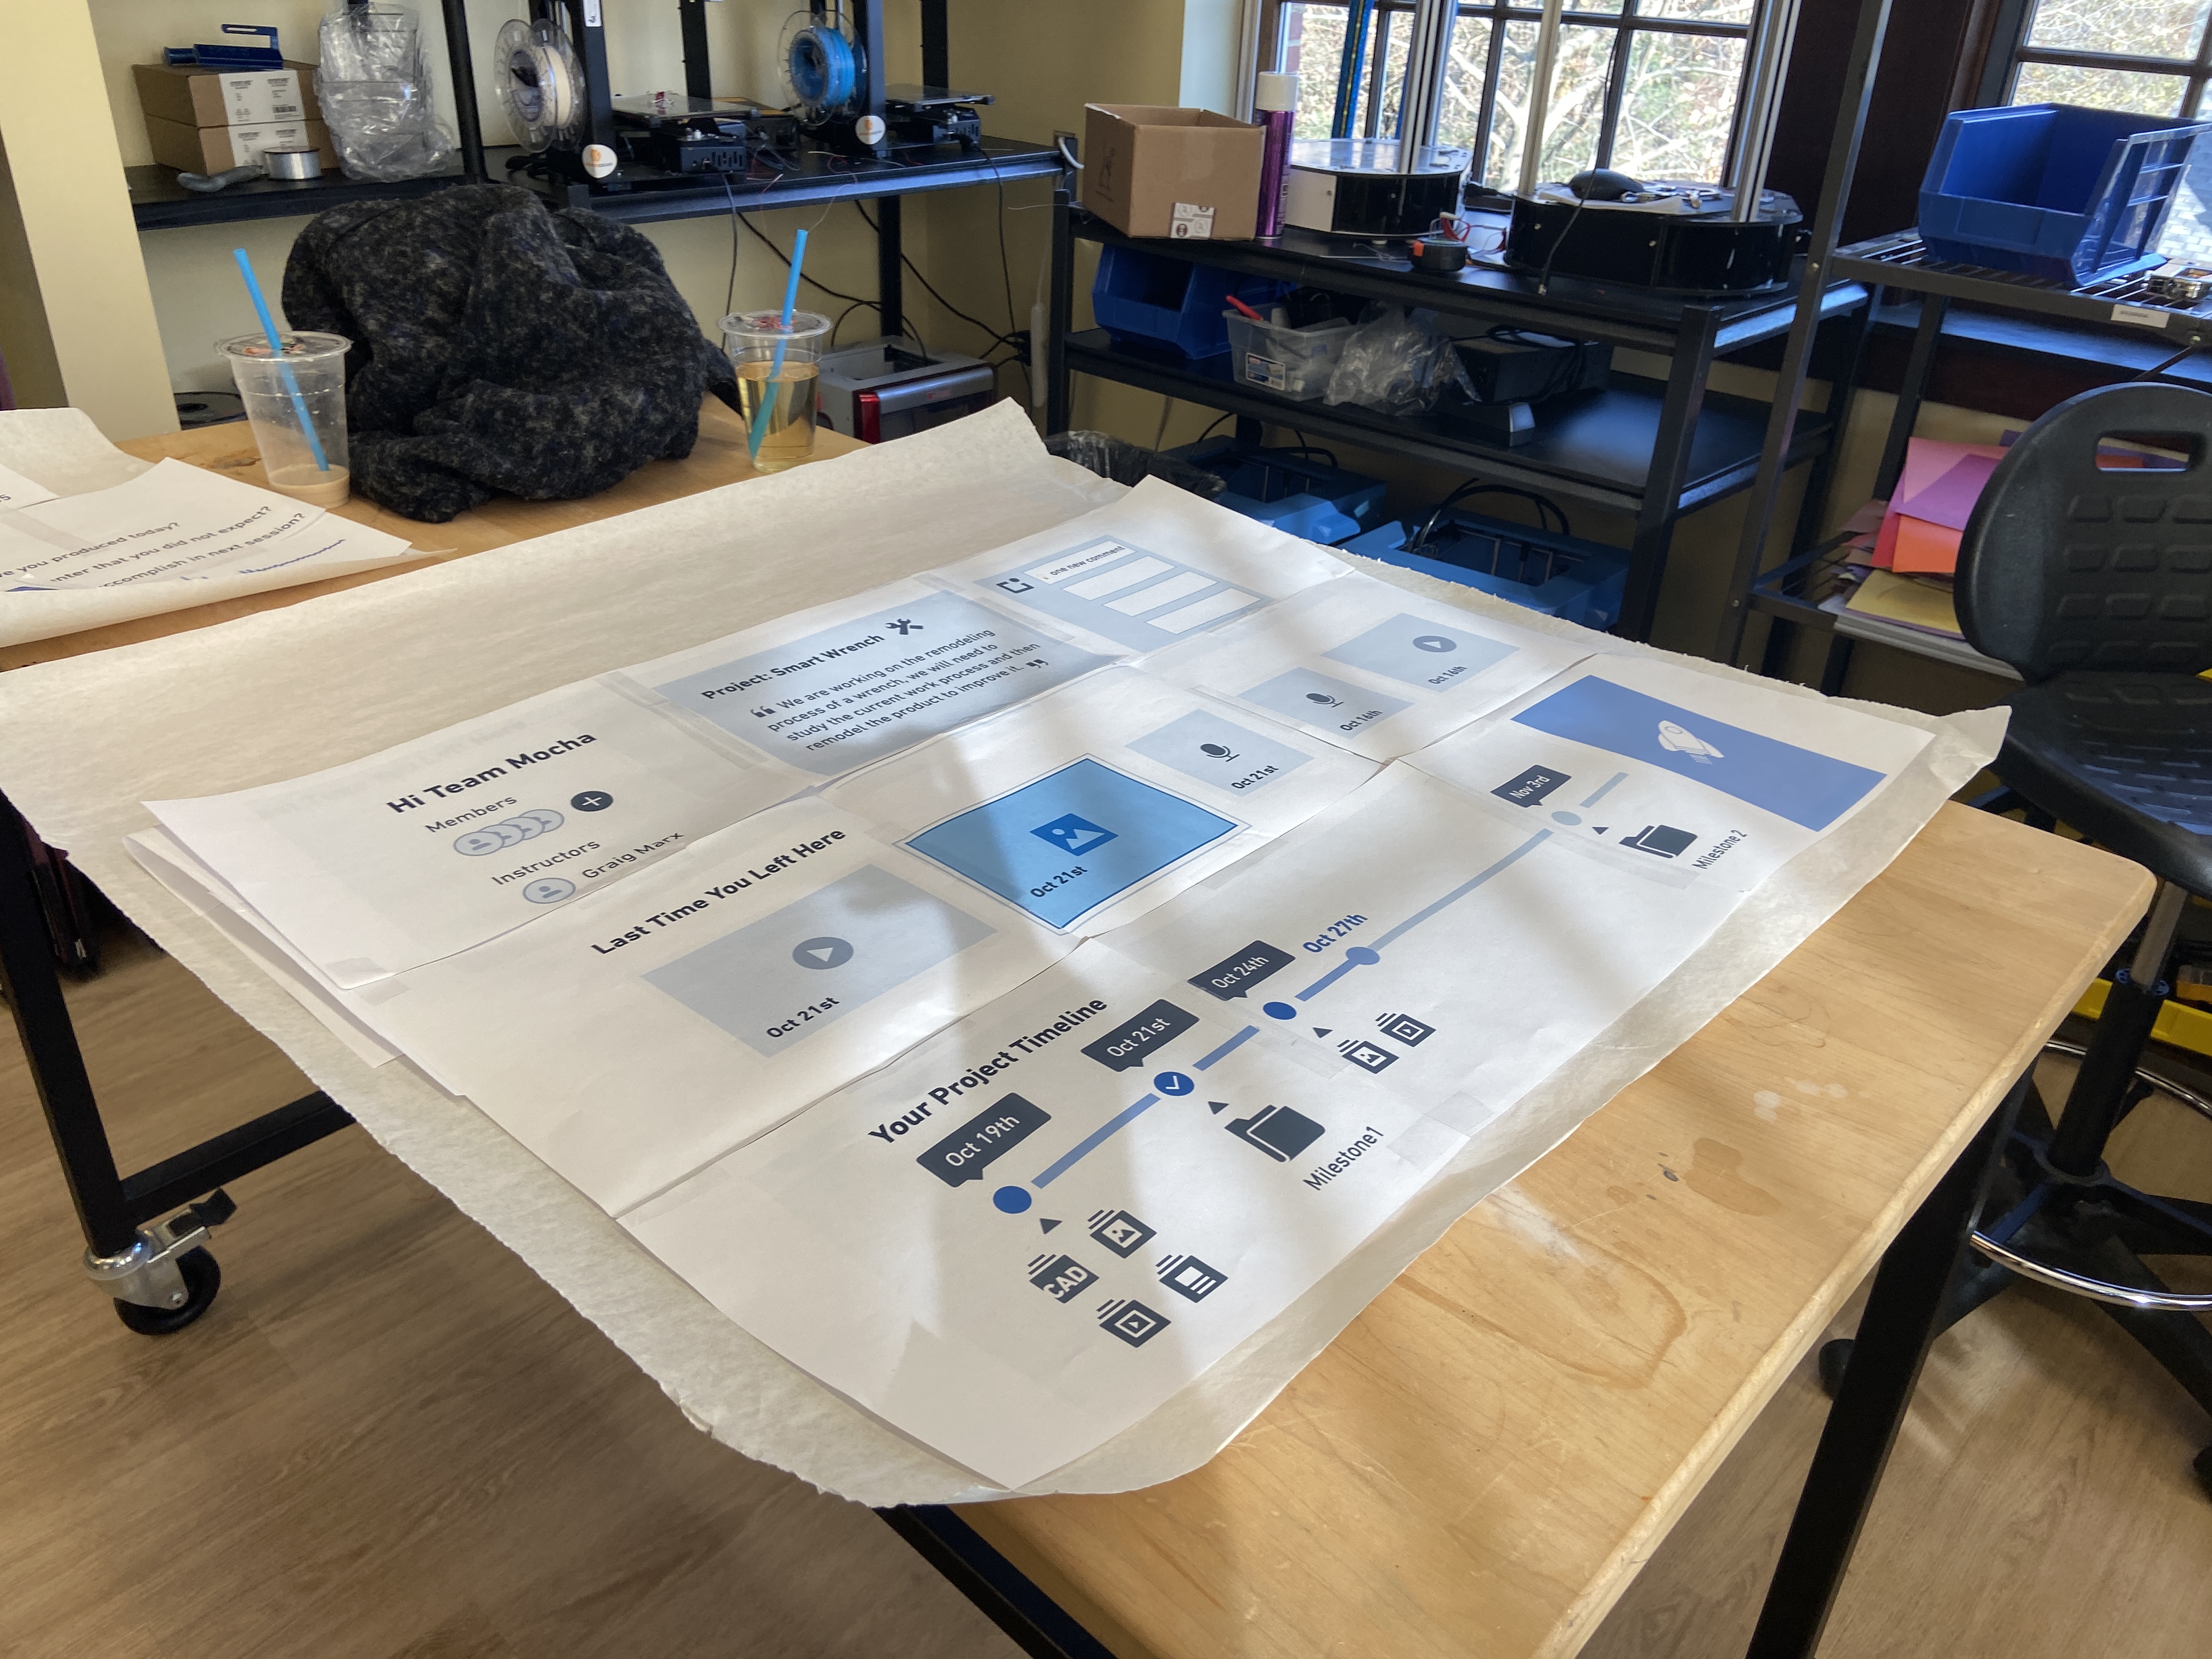
🔎 Finding No.1: Students need to change their project timelines during their project.
🔨 Iteration No.1: Added the ability to modify milestones/checkpoints during the project.
🔎 Finding No.2: Students have different preferences regarding types of input methods for reflections.
🔨 Iteration No.2: Added different input methods, including voice, typing, writing, sketching, and video recording.
🔎 Finding No.3: The functions of some buttons are unclear.
🔨 Iteration No.3: Changed the representations and placement of buttons to make their functions clear.
■ Video Prototyping
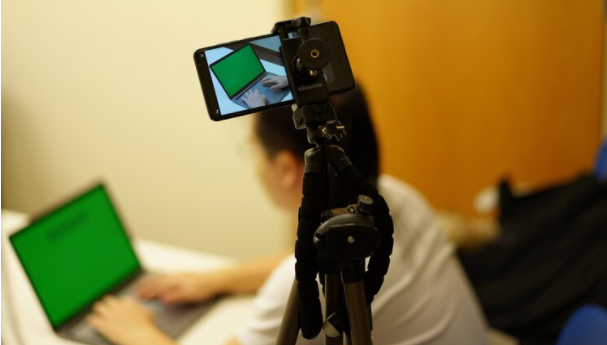
For the second round of prototyping, we would like to test the look-and-feel of our design. Therefore, we created hi-fi interfaces for the realistic feel and a video prototype for showing the actual use scenarios.
See video transcript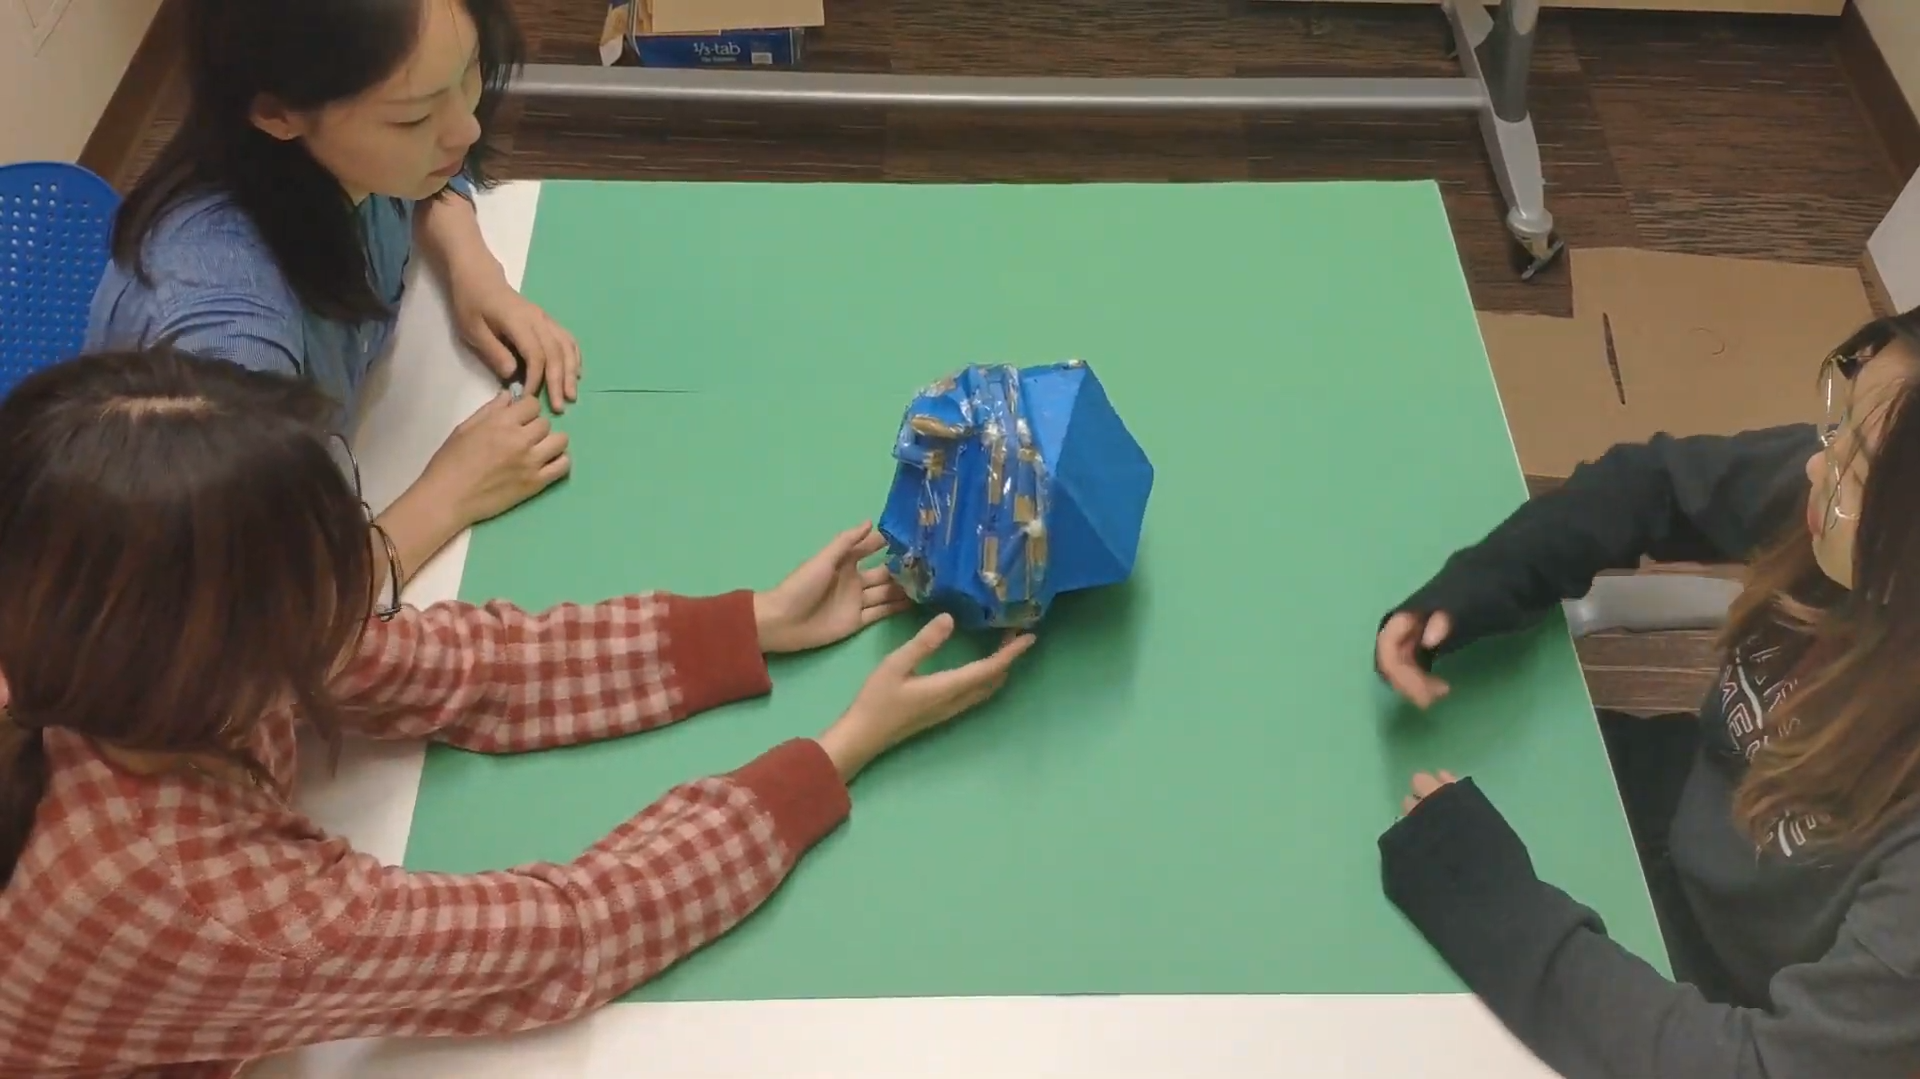
We showed the videos to the students in the class and other students who normally participate in PBL courses and gathered their feedback to further polish our design.
Final Design
Our design constitutes of two parts, a physical room with interactive whiteboards/tables and an accompanying online platform that could also be accessed elsewhere.
The specific features are aligned with the students' learning goals for the maker space course:
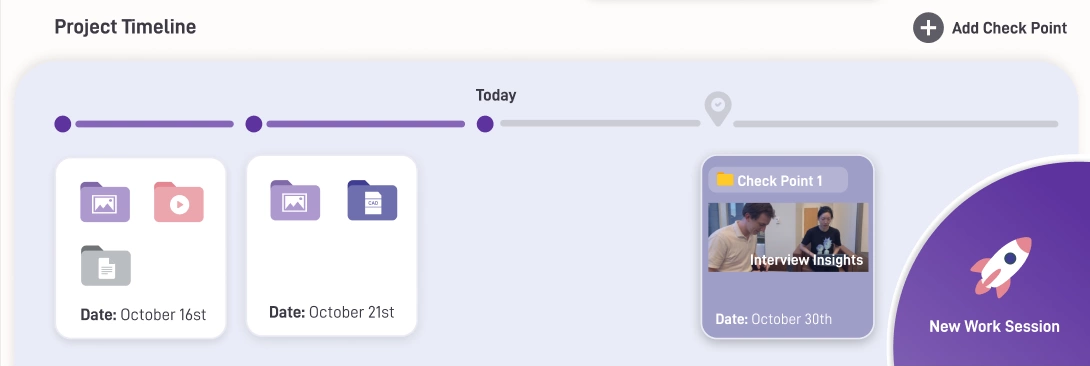
■ Project Timeline — Project Management Skills
At the start of each project, the students will be prompted to plan their project ahead by creating milestones and checkpoints on the project timeline. By planning their projects ahead, the students will gradually practice their project management skills.
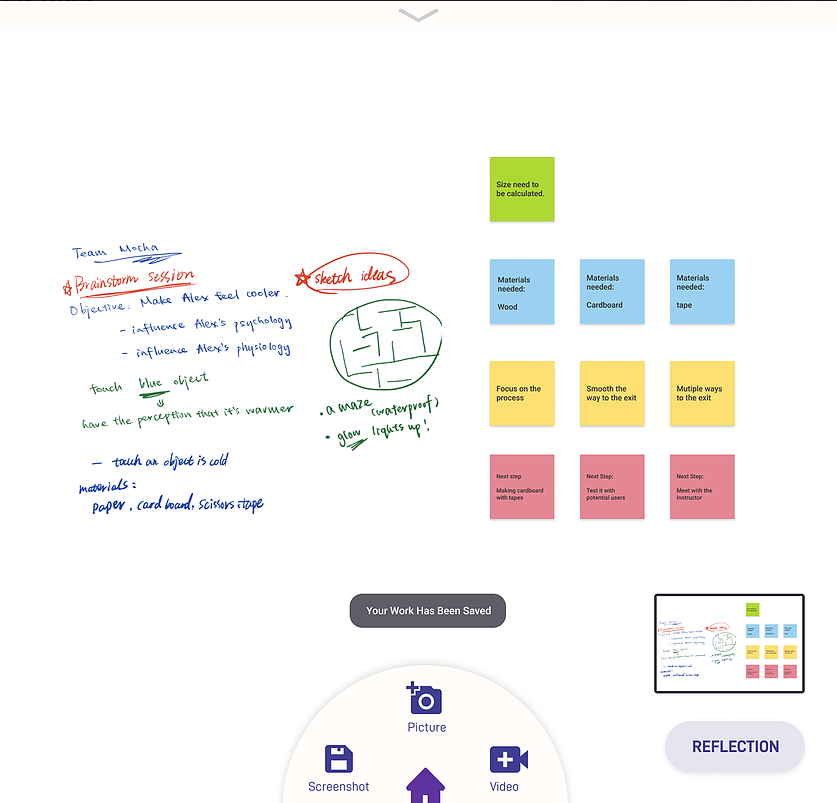
■ Screenshot, Pictures, and Videos — Documentation Skills
Students will get into the habit of documenting their work in an organized place. The screenshot feature will convert their drawing and physical sticky notes to digitized forms to be saved for future use.
■ AR Overlay — Scaffolding for Prototyping Skills
As students work on the interactive table, the table can provide an AR overlay with enriched information to help the students finish their prototypes.
■ Reflection Prompts — Meta-cognitive Skills
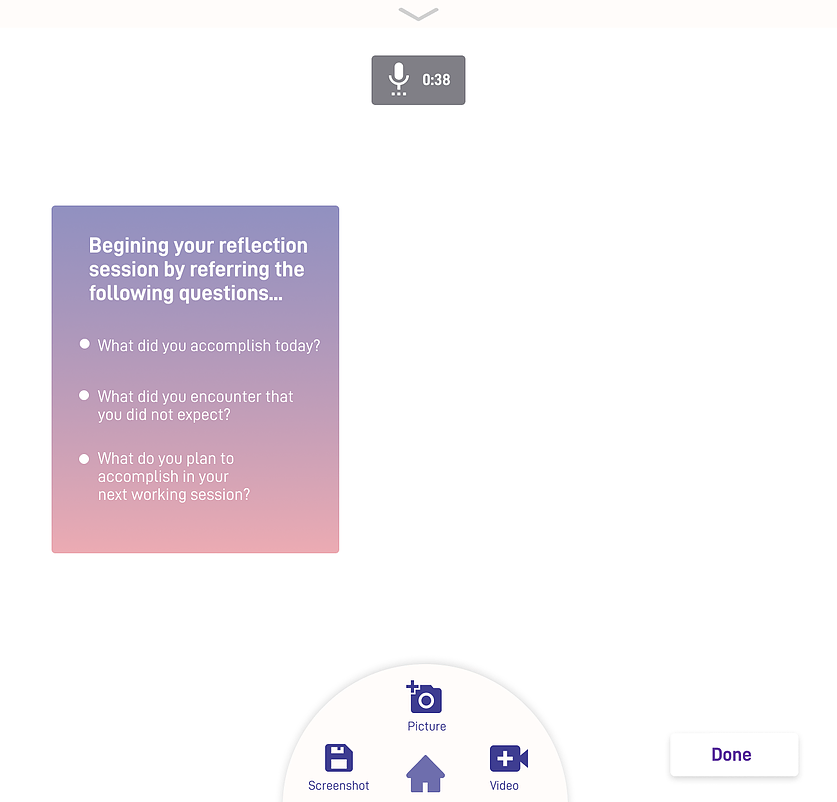
The system will scaffold the students for self-reflection. It will prompt the students with some reflection questions at the end of the work sessions. Students can draw, type, or use their voice for their reflections.
This optional reflection prompt will help the students to get into the habit of reflecting on their own work, honing their meta-cognitive skills.
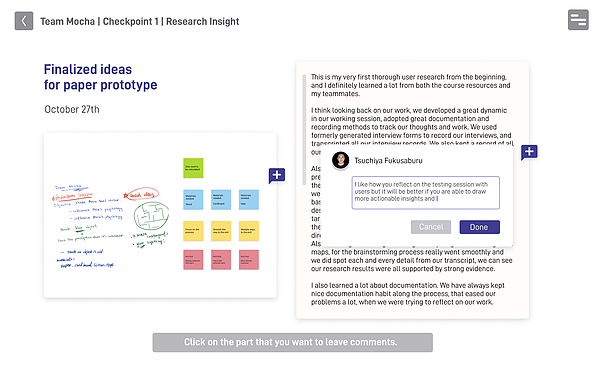
■ Instructor Comment — Help Students Improve
The instructor can view the students' work anywhere with the online platform. The students' files will be organized on the timeline so it’s easy for the instructor to find them.
The instructor can make comments on students' work by typing or voice recording to help students improve. He can also better assess the quality of students' work and student contributions.
Post Mortem
What worked well?
- We did solid user research and worked closely with our stakeholders to co-design the solution.
- We did great needs-finding and synthesis to help consolidate our design features.
What could be better?
- We need to consider more about the business value of our design in educational contexts.
- Prototyping needs more time. We could do more user testing and more iterations to polish our design even more.